Kernaro Assist Configuration Guide
This guide provides a structured overview of how to configure Kernaro Assist after installation. The Setup window is the central location for managing AI models, tools, agents, and system settings.
Accessing the Setup Window
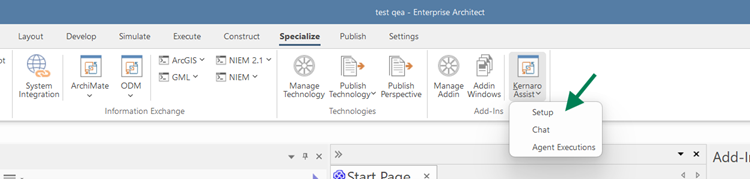
To begin configuration: Add-Ins → Kernaro Assist → Setup
The Setup window allows you to configure AI providers, manage agents, connect external tools, and adjust system behaviour.
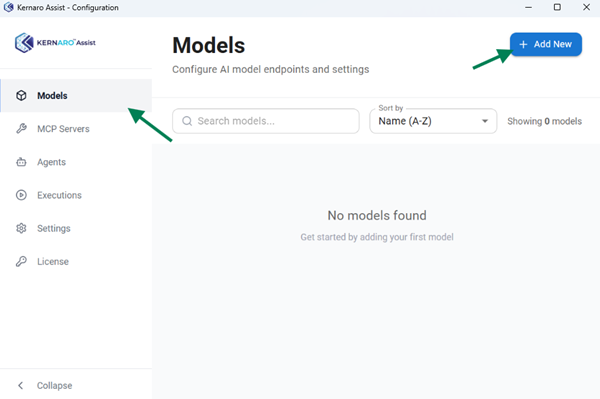
Models
The Models tab is used to connect Kernaro Assist to AI providers. At least one model must be configured before using chat or agents.
Supported AI Providers
| Provider | Supported Models | Required Credentials |
|---|---|---|
| Anthropic (Claude) | Claude Sonnet 4.5, Claude Sonnet 4.6, Claude Opus 4 | API Key |
| Azure OpenAI | GPT-5.1, GPT-5.2 | API Key, Deployment Endpoint, API Version |
| OpenAI | GPT-5.1, GPT-5.2 | API Key |
Adding a Model
- Navigate to Add-Ins > Kernaro Assist > Setup.
- Open the Models tab.
- Click + Add Model.
- Enter required details.
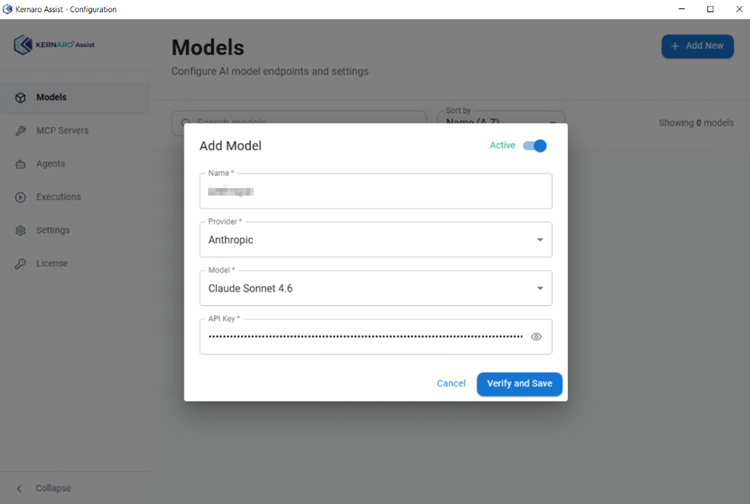
- Click Verify and Save.
The system validates the configuration before saving. API keys are securely stored in encrypted form on the local machine.
Model Fields
| Field Name | Description |
|---|---|
| Name | Friendly identifier for the model (e.g., “My Claude” or “Work GPT”). |
| Provider | OpenAI, Anthropic, or Azure OpenAI |
| Model | Select from supported models |
| API Key | Your API key from the provider’s account portal. |
| Deployment Endpoint (Azure only) | The full Azure endpoint URL for your resource. |
| API Version (Azure only) | The Azure API version string to use (e.g., 2024-02-01). |
Managing Your Models
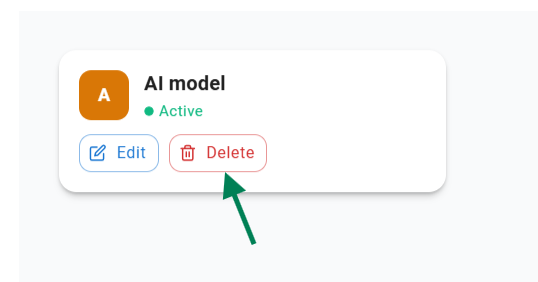
- Edit: Click the edit icon on a model card to update any of its fields.
- Active/ Inactive: Toggle the Active switch on a model card to enable or disable it. A model cannot be deactivated if it is set as the default or assigned to any agent.
- Delete: Click the trash icon to permanently remove a model. A model cannot be deleted if it is the default or used by any agent.
- Set as Default: Open the Settings tab (Section 4.5) and choose this model as the Default Chat Model.
Default Model Behaviour
The default model is used for all chat conversations across all repositories. You can set the default model in the Settings tab.
If no default is set:
- If only one model exists, it is used automatically
- If multiple models exist, the first added model is used
Note: Models are shared across all EA repositories. Agents can use different models than chat.
MCP Servers
The MCP Servers tab allows integration with external tools using the Model Context Protocol.. Once configured and active, these tools can be used in both the Chat window and within agents.
How to Add an MCP Tool
- Go to Add-Ins > Kernaro AI (Beta) > Setup.
- Click the Tools tab.
- Click + Add Tool.
- Enter a Name for the tool.
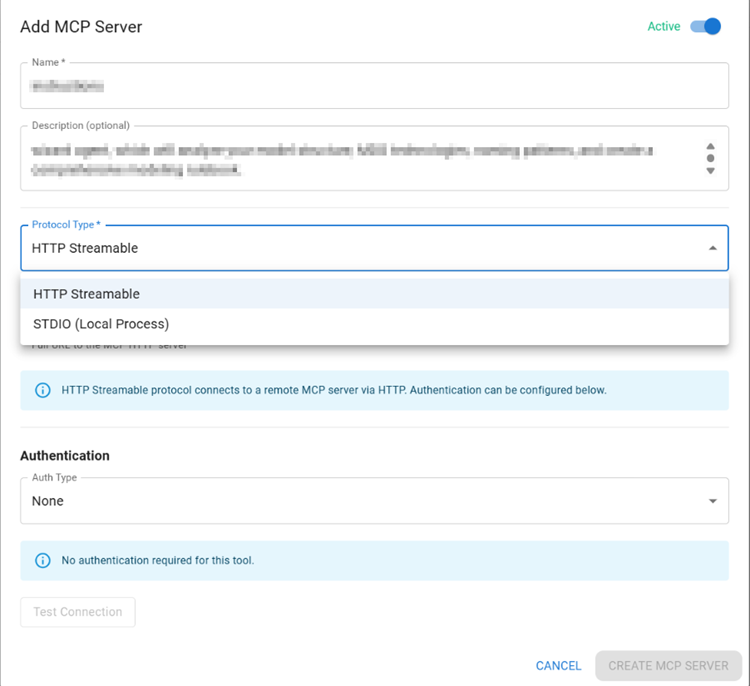
- Select a Connection Type: STDIO or HTTP Streamable.
- Select Authentication type from the drop down if HTTP Streamable selected
STDIO Connection:
Use this option to run a local program as an MCP tool server.
- Command: The executable to run (for example: node, python, npx)
- Arguments: Command-line arguments, space-separated
HTTP Streamable Connection:
Use this option to connect to a remote MCP server over HTTP or HTTPS.
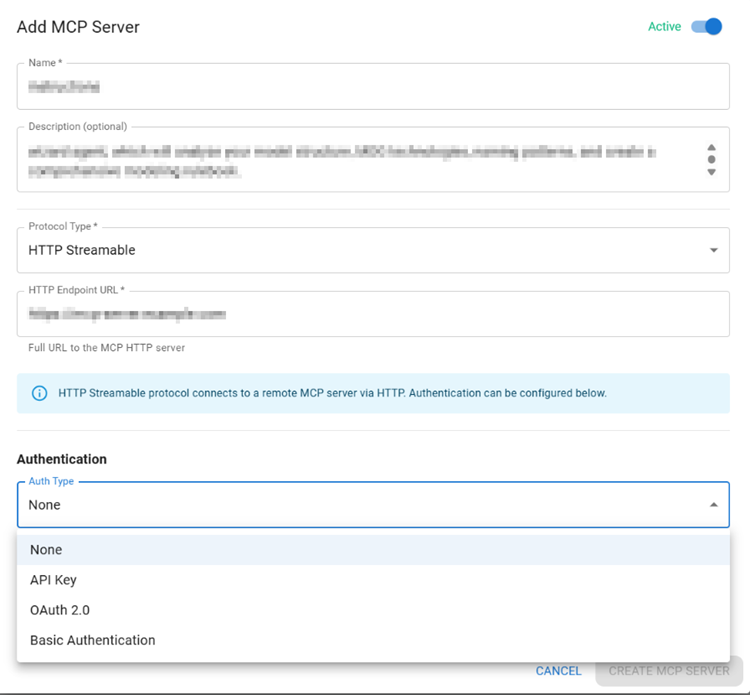
Endpoint URL: Full URL of the MCP server
Authentication Options
- None: No authentication required
- API Key: Enter the API key provided by the server
- Basic Auth: Enter username and password
- Client Credentials: Provide Client ID, Client Secret, and Token URL for OAuth 2.0
After testing, available tools will be displayed. Ensure expected tools are listed before saving.
- Click Test Connection.
- If successful, the available tools from the MCP server will be displayed.
- If it fails, review the configuration and try again.
- Click CREATE MCP SERVER.
Managing Your Tools
- Edit: Click the pencil icon on a tool card to update its configuration.
- Activate / Deactivate: Toggle the Active switch on a tool card. A tool cannot be deactivated if it is currently used by any agent.
- Delete: Click the trash icon to remove a tool.
Note: A tool cannot be deactivated or deleted if it is currently assigned to an agent. Reassign the agent before making changes.
Agents
Agents are configurable AI assistants designed for specific tasks. They can run manually or be triggered automatically by EA events. An agent is a pre-configured AI assistant with a specific role, instructions, an assigned model, and optionally access to tools and automated EA event triggers. Agents can be run manually on demand or triggered automatically when something happens in EA.
Creating an Agent
Click + Add Agent to open the agent creation wizard. The wizard has three steps:
Step 1 – Identity
Define the purpose and behaviour of the agent.
- Agent Name: A clear, descriptive name for the agent (e.g., “Class Name Validator”).
- Agent Definition (Role): A short description of the agent’s purpose. This helps the AI understand its persona.
- Instructions: Detailed instructions telling the AI exactly what to do. Write these in plain natural language, as if briefing a new team member.
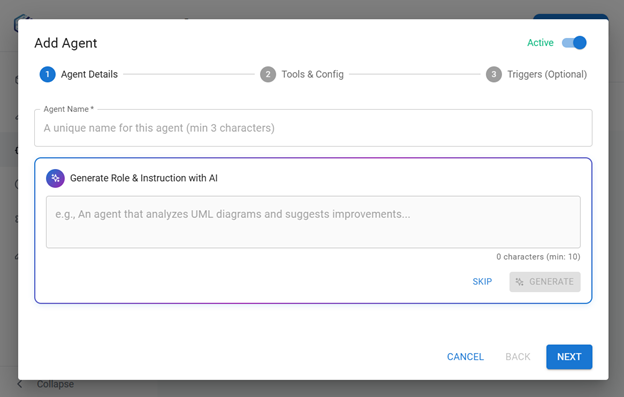
You can also click Generate with AI to automatically create a draft for Role and Instructions, which you can review and edit.
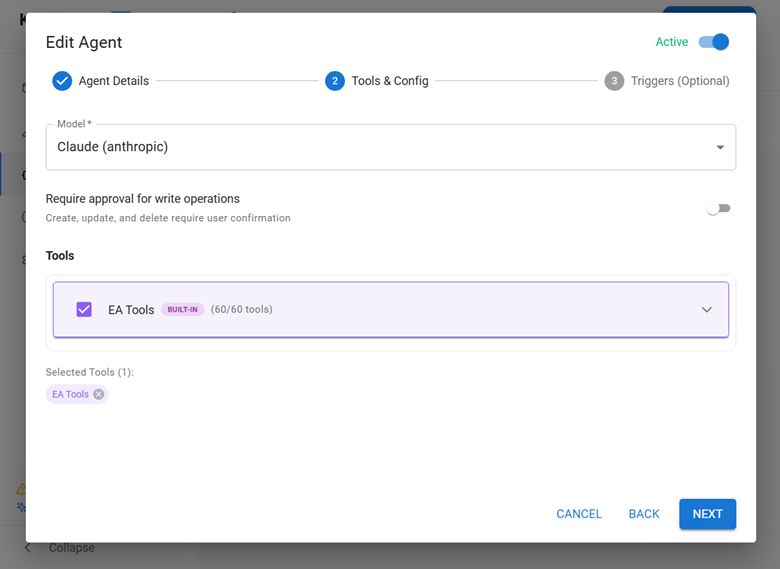
Step 2 – Configuration
Configure the agent’s model, tools, and approval behaviour. Only active models and active tools are listed here.
- AI Model: Select the language model this agent will use.
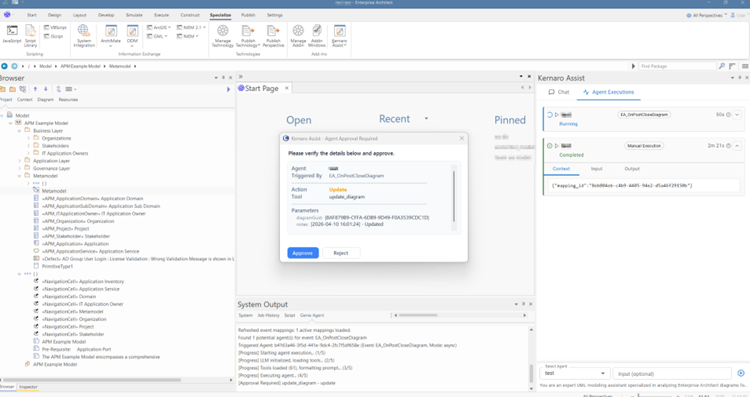
- Approval Toggle: Controls whether the agent asks for your approval before making any write operation. When ON: the agent pauses before each change as like the image below. When OFF: the agent executes changes automatically
- Tools: Choose which MCP tools this agent has access to.
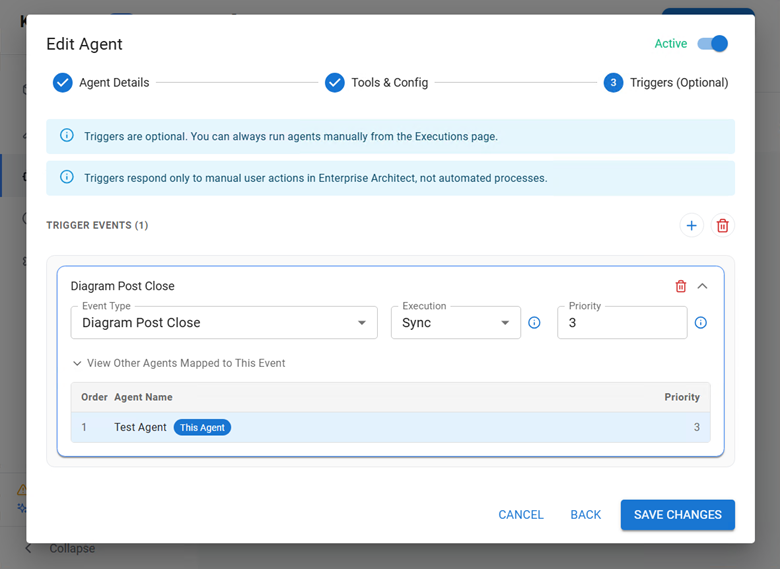
Step 3 – Events (Optional)
Optionally configure the agent to run automatically based on EA events. Event mappings do not interfere with or suppress EA’s normal processing.
- EA Event: Choose from the list of available EA lifecycle events (element created/modified/deleted, diagram opened/closed, connector created, etc.).
- Trigger Mode: Async – EA does not wait for the agent to finish. Sync – EA waits for the agent to complete before continuing.
- Priority: When multiple agents are mapped to the same event, priority determines the order they run. Lower numbers run first.
Note: Event mapping is optional. Skip this step if the agent is intended for manual execution only.
Managing Your Agents
- Edit: Click the pencil icon on an agent card to update any of its settings.
- Delete: Click the trash icon to remove an agent.
- Repository availability: Agents mapped to EA events are available only in the EA repository where those event mappings are active. Agents with no event mappings are available in all EA repositories.
Running an Agent Manually
Agents can be triggered on demand from the Executions tab:
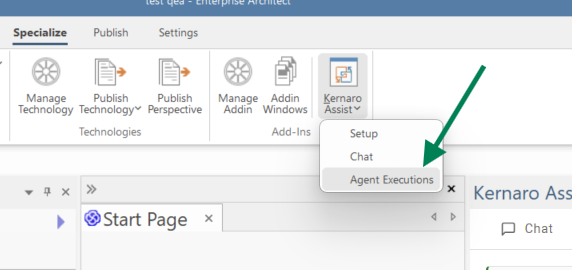
- Go to Add-Ins > Kernaro AI (Beta) > Setup and click the Agent Executions tab.
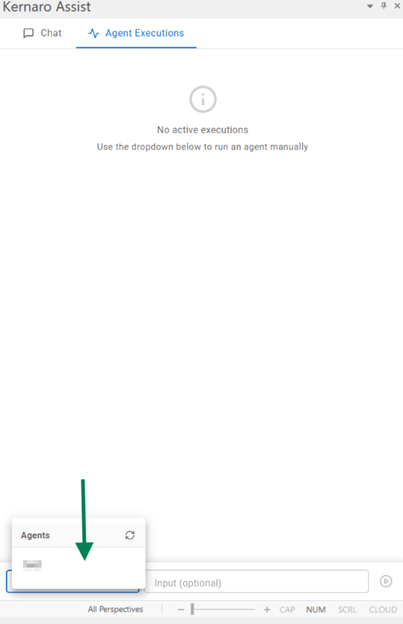
- In the agent list, select the agent you want to run.
- Optionally, type any additional context or instructions in the input field.
- Click Run.
The execution appears in the history list. Click it to see execution details.
Key Notes on Agents
- Agents can automate repetitive modeling tasks
- They can operate with or without user approval
- They can be triggered manually or automatically through EA events
- Each agent can use a different model and set of tools
Executions
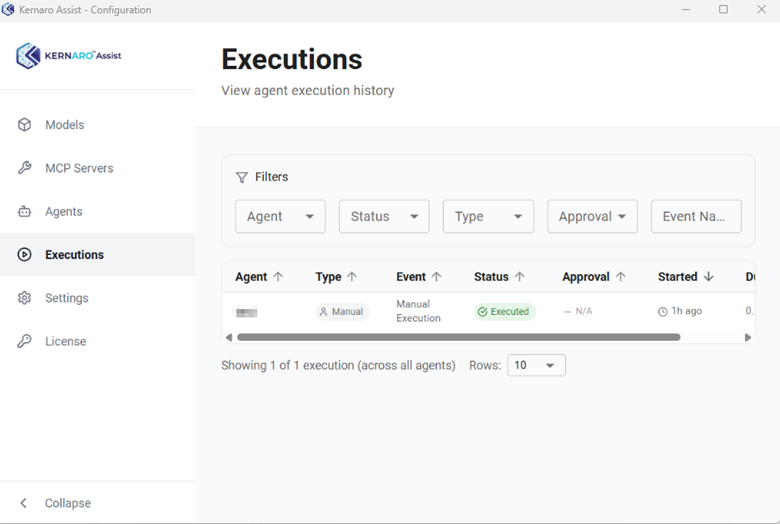
The Executions tab provides a complete history of all agents runs, whether triggered manually or automatically. Access it from Add-Ins > Kernaro Assist > Setup > Executions.
What You Can See
- A list of all past executions with the agent name, when it ran, and the result
- Filter the list by agent, status, etc.
- Click any execution to view detailed information: input provided, AI decision and reasoning, actions performed and their results, and any errors encountered
Execution Statuses
| Status | Description |
|---|---|
| Triggered | The agent has been queued for execution |
| Running | The agent is currently processing |
| Executed | The agent completed successfully |
| Failed | Something went wrong (click for details) |
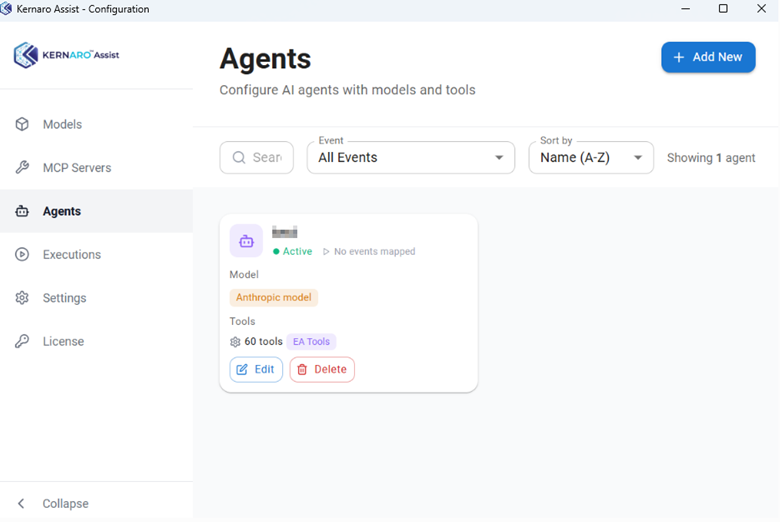
Agent Metrics
In the Agents tab, each agent card shows an execution summary with metrics such as total runs, success rate, and last run time. Click the card to see the detailed execution history for that specific agent.
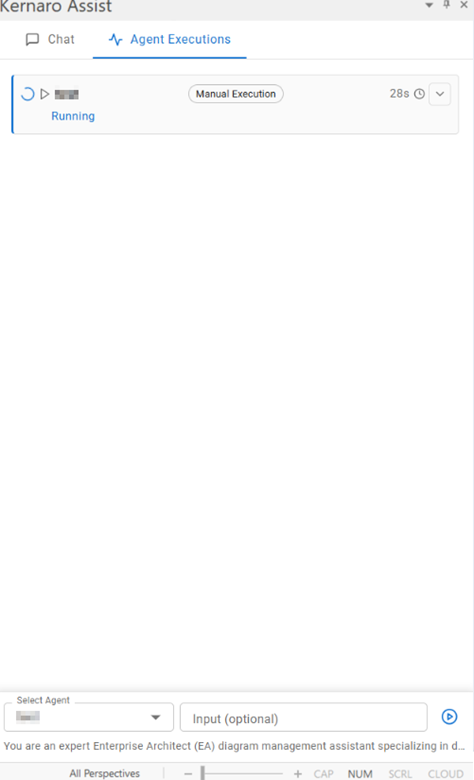
Agent Executions in the Chat Window
The Chat window has an Agent Executions panel that shows the current session’s running agents. This panel is a live view of active executions – it is not the full history. For the complete execution record with filters and details, use the Executions tab in Setup.
Settings overview
Access from Add-Ins > Kernaro AI (Beta) > Setup > Settings. The Settings tab allows you to configure chat behavior, workspace files, Python execution, and logging.
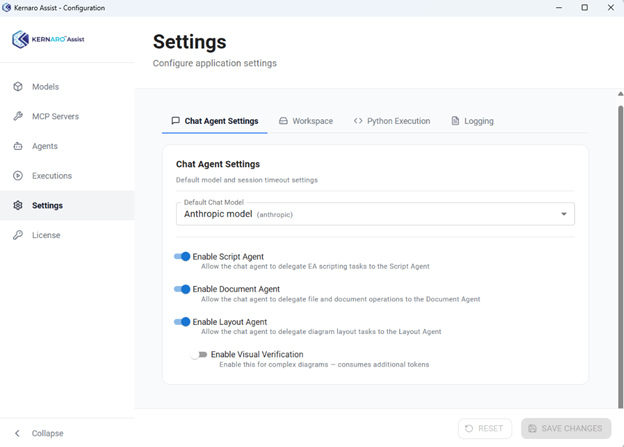
Chat Agent Settings
This section controls the default model for chat and the availability of built-in chat agents.
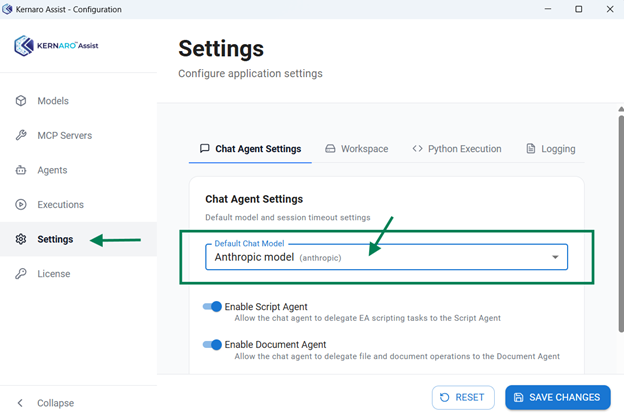
Default Chat Model
Select the model used for all chat conversations and click Save. If no default is set and only one model is active, it is used automatically.
Built-in Chat Agents
- Script Agent: Generates and manages EA automation scripts within the repository. Write operations through a script bypass the approval step even in Plan or Ask-to-Edit mode. Enable only when confident in its output. Default scripting language is JavaScript.
- Document Agent: Generates Word and PDF documents from EA model content on request.
- Layout Agent: Automatically arranges diagram elements using built-in layout algorithms.
Note: After enabling or disabling any built-in agent, reload the EA project (File > Reload Project) for changes to take effect.
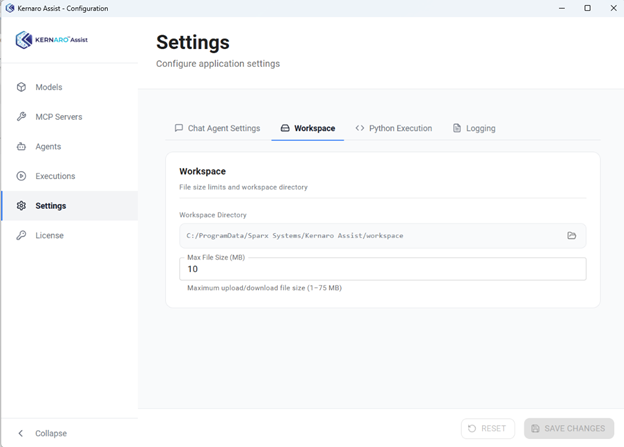
Workspace
The Workspace tab lets you upload files that the AI use as a rule book and can use as a reference during chat sessions.
- Supported Files: Images, text files, documents, and similar artefacts
- Storage Path: Displays where files are stored locally
- File Size Limit: Files exceeding the limit cannot be uploaded
To use a file in chat: click the paperclip icon in the chat input bar to browse workspace files and attach one to your message. The AI will read and reference the attached file in its response.
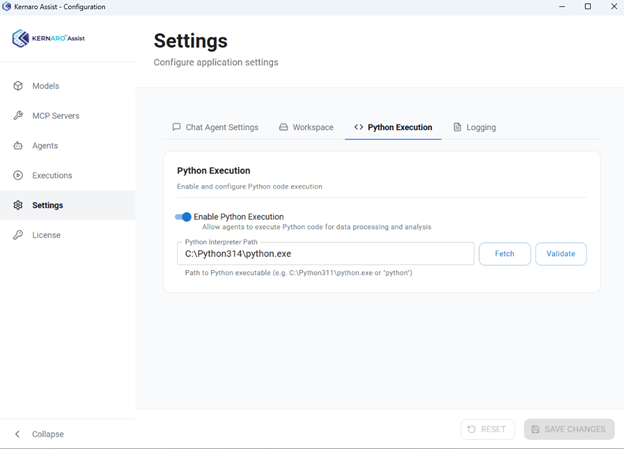
Python Execution
This tab controls whether the AI is permitted to execute Python code on your machine.
- Enable / Disable toggle: When enabled, the AI can run Python scripts as part of a chat task.
- Auto-fetch interpreter: Click Fetch to let Kernaro Assist automatically detect the Python interpreter installed on your machine.
- Manual path: Enter the full path to the Python executable and click Validate to confirm it is working.
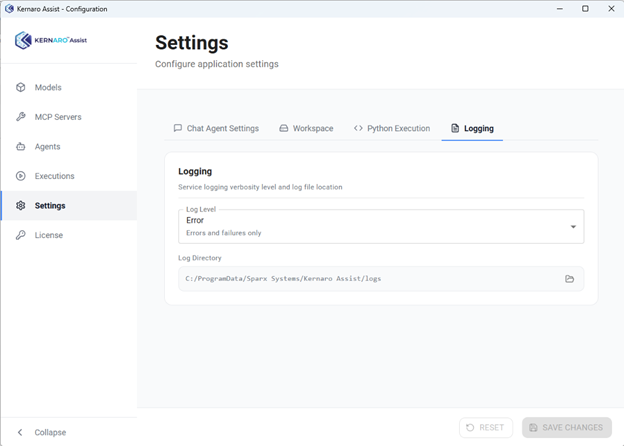
Logs
The Logs tab provides access to application logging configuration.
- Log file path: Displays the full path to the current log file on disk.
- Log Level: Controls the verbosity of logging. ERROR (default) records only errors. DEBUG records detailed diagnostic information and should be used only when actively troubleshooting.
Note: After changing any setting, click Save and then reload the EA project (File > Reload Project) for the change to take effect. Revert Log Level back to ERROR after troubleshooting.
Setup Troubleshooting & FAQ
Common Setup Issues
Model validation fails when saving
- Confirm the API key has no extra spaces.
- Ensure your account with the provider has available credits.
- For Azure OpenAI, double-check the endpoint URL and API version.
MCP tool connection test fails
- For STDIO: verify the command path is correct and the executable exists.
- For HTTP: confirm the endpoint URL is reachable and authentication details are correct.
Cannot deactivate or delete a model or tool
- A model or tool in use by an agent cannot be changed. Reassign the agent to a different model or tool.
