How to search Sparx Systems Enterprise Architect model data using EA GraphLink
Overview
EA GraphLink harnesses the power of GraphQL to redefine the interaction with data in Sparx Systems Enterprise Architect. By enabling the creation of reports through simple selections rather than complex queries, it introduces an intuitive approach to reporting. This innovation simplifies reporting processes, making it more accessible to business users and showcasing the value of data insights captured in Sparx Systems Architecture Platform.
Designed for enterprise-level scalability and flexibility, EA GraphLink seamlessly integrates with modern application ecosystems, ensuring efficient and secure data management. It provides a user-friendly interface for interacting with complex datasets through GraphQL, bridging the gap between sophisticated data requirements and practical usability.
Prerequisites for Configuring EA GraphLink
- Ensure the Sparx Systems Enterprise Architect model is hosted in a server or cloud environment to facilitate seamless integration.
- Identify the MDG files applied to the EA model, referred to as schemas in EA GraphLink. These files are required for importing into EA GraphLink. Examples of MDG files include SysML, ArchiMate, APM, or custom technologies. Ensure these files are readily accessible.
- A user account is required to access EA GraphLink. Refer to the Installation Guide for instructions on account setup.
Important: EA GraphLink is exclusively compatible with MSSQL and MySQL. Verify that the EA model is uploaded to a supported database type before initiating the configuration process.
Launching EA GraphLink
Open the EA GraphLink application in a browser by entering the domain where it is hosted (e.g., http://localhost:8090/). Log in using the username “admin” and the password. Refer to the Installation Guide for instructions on account details.

Connecting Your EA Model to EA GraphLink
To get started, Let’s connect the EA model by navigating to Manage EA Models > Add Connection. A pop up will be shown to enter the model details.
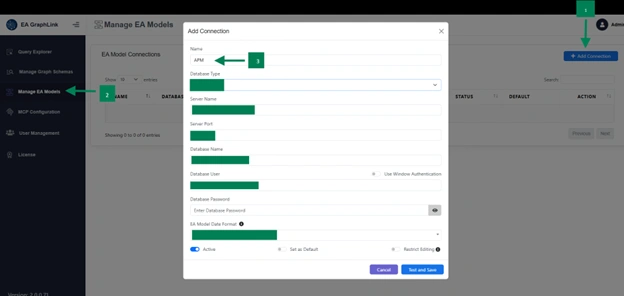
| Field | Description |
|---|---|
| Database Type | Select the Database type of connecting model MSSQL / MySQL |
| Server Name | Enter the Server Name |
| Server Port | Enter the Server Port Number |
| Database Name | Enter the Database Name |
| Use Window Authentication | Toggle if you opt to Use Window Authentication Note: This option is applicable only to MSSQL |
| Database User | Enter the Username |
| Database Password | Enter the Password |
| EA Model Date Format | Choose the date format to use for the (Date) tagged value in the Graph query filter. |
| Set as Default | Enable this toggle will set this model connection as default on query Explorer page |
| Restrict Editing | When this toggle is enabled, EA Model Connection Details will be hidden once added. Note: Even an admin cannot edit it after it’s added, it can only be deleted and re-added to make any changes. |
If the entered details are valid, the connection will be successfully added to the EA Models list page, as illustrated in the image below.
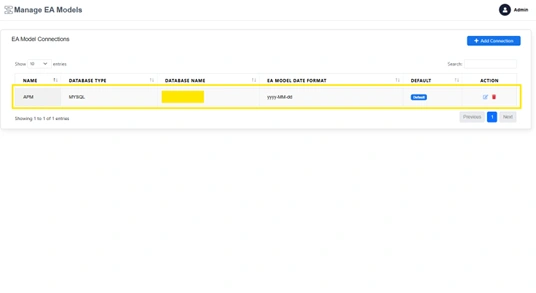
Note: Once a connection is successfully added, it will appear in the Query Explorer view under the Repository selection field as an available option. A ‘Default’ tag will indicate if it has been set as the default connection
Exclude Package Feature
This enhancement provides the ability to exclude selected packages from Graph Query execution, offering more precise and customizable results. By combining package selection, recursive exclusion options, and a global enable/disable toggle, users gain improved control over which sections of the repository are considered during analysis.
Learn more
Uploading Model Schema
To enable EA GraphLink to interpret a model’s structure, uploading the schema, commonly referred to as the MDG file, is a critical step. This ensures that EA GraphLink accurately understands the model’s structure and details for efficient reporting.
For example, when connecting an EA model created with SysML or UML technologies, the corresponding MDG file must be uploaded as a schema to meet business requirements.
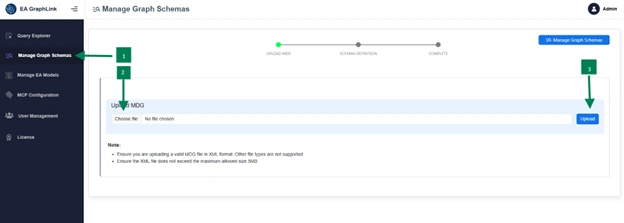
Steps to Upload a Schema:
- Navigate to Manage Graph Schemas.
- Select the appropriate MDG files.
- Click Upload to finalize the process.
Note: EA GraphLink supports the upload of both standard and custom MDG files as schemas.
Acknowledge the uploaded schema which contain stereotypes with dependencies by confirm button
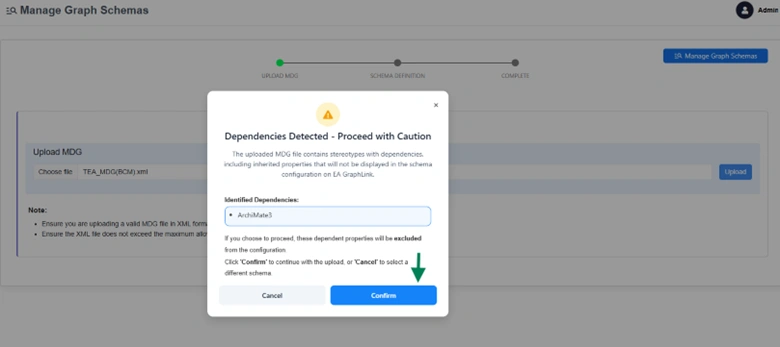
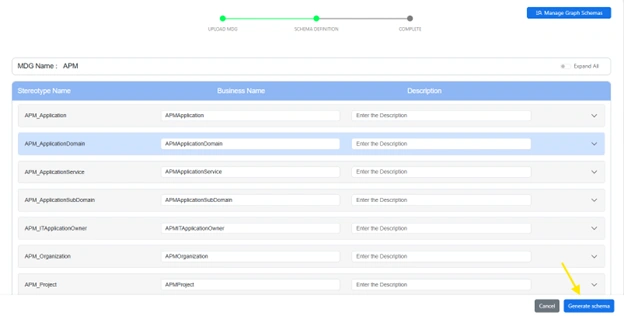
Followed by” Generate schema” button will add Graph Schema successfully.
Strict Connector Direction
Strict Connector Direction is a per-schema setting in EAGraphLink that controls how connected elements are retrieved based on their relationship direction (incoming or outgoing).
When enabled (default), GraphQL queries return only the connected elements that match the exact direction defined in the schema — for example, only incoming or only outgoing relationships.
When disabled, queries return connected elements from all directions regardless of the connector direction defined in the schema.
This setting is useful when your EA model contains connectors where the direction may not be consistently modeled, or when you want a broader view of all relationships without strict directional filtering.
Default Behavior
| Setting | Behavior |
|---|---|
| Enabled (default) | Connected elements are filtered by their connector direction (incoming/outgoing) as defined in the schema |
| Disabled | Connected elements are returned from all directions, ignoring the connector direction defined in the schema |
Note: Enabling Strict Connector Direction is the default and preserves backward-compatible behavior. Existing schemas will continue to work as expected without any changes.
Where to Configure
Strict Connector Direction can be configured in two places:
1. During Schema Generation (Generate Graph Schema page)
When uploading a new MDG file to generate a schema, the Strict connector direction toggle is available in the schema definition step.
Steps:
- Navigate to Manage Graph Schemas from the sidebar
- Click Generate Graph Schema
- Upload your MDG Technology XML file and click Upload
- In the Schema Definition step, locate the Strict connector direction toggle (top-right area, next to the Expand All switch)
- Toggle it ON (enabled) or OFF (disabled) based on your requirement
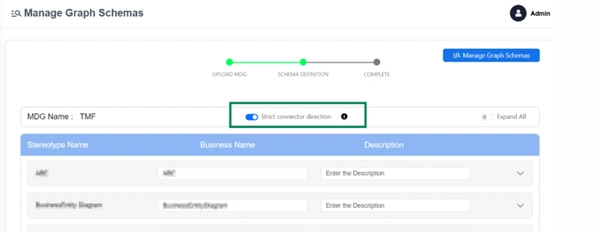
6. Hover over the info icon (i) next to the toggle to see a description of the setting
7.Click Generate schema to complete
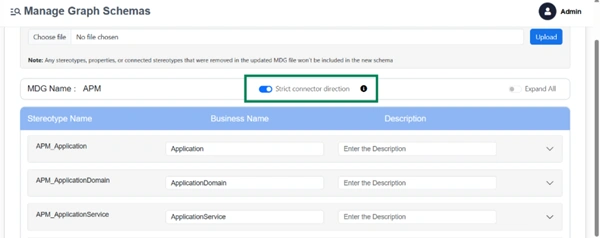
2. While Editing an Existing Schema (Edit MDG page)
You can change the setting for an already generated schema by editing it.
Steps:
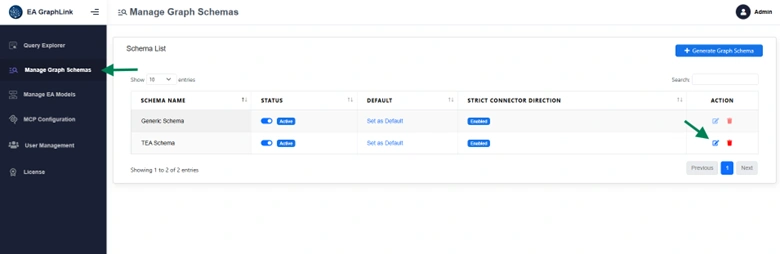
- Navigate to Manage Graph Schemas from the sidebar
- In the Schema List table, click the Edit icon for the desired schema
- On the Edit MDG page, locate the Strict connector direction toggle
- Toggle it ON or OFF
- Click Generate schema to regenerate the schema with the updated setting
Setting Business-Friendly Definitions for Artifacts and Properties
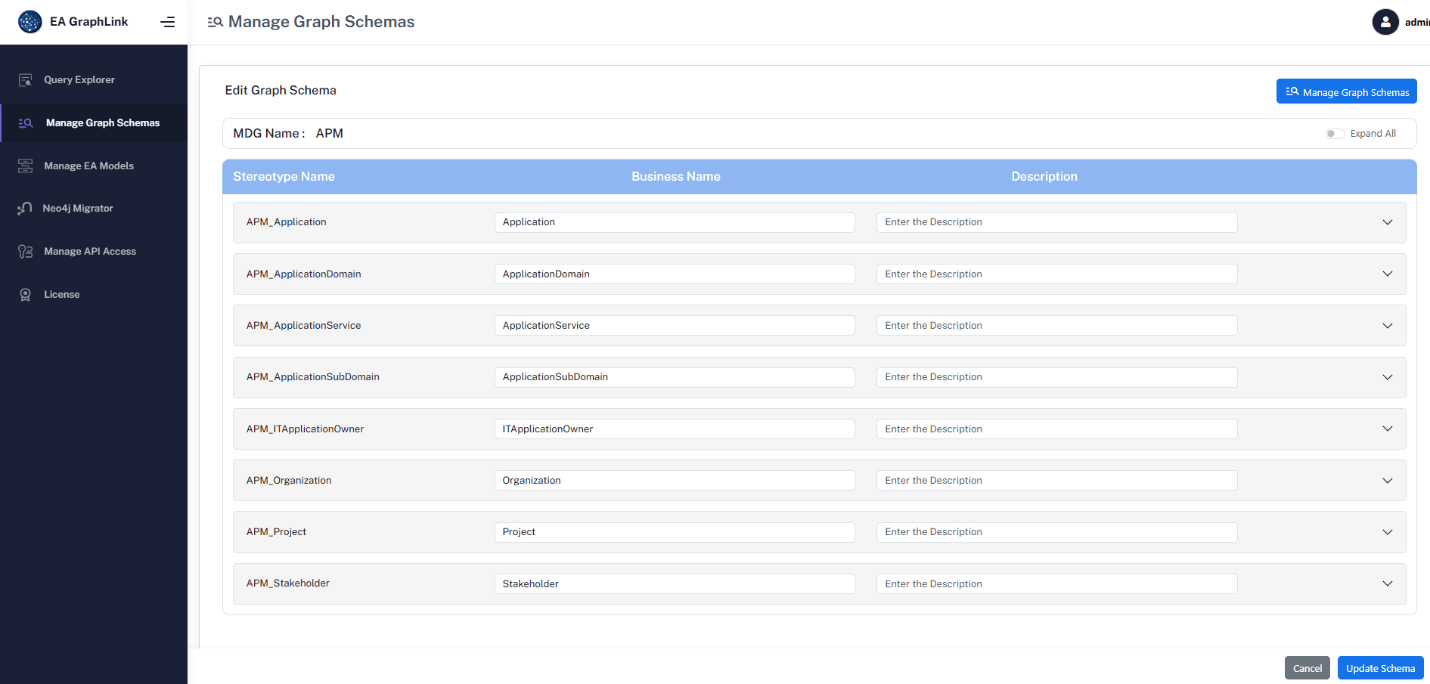
Modifying Business Names for Stereotypes
- Select the relevant schema from Manage Graph Schemas page.
- Click on the pencil icon associated with the schema.
- Locate the specific row corresponding to the stereotype.
- Update the Business Name field to reflect the desired terminology.
- Click on Update Schema to save the modifications
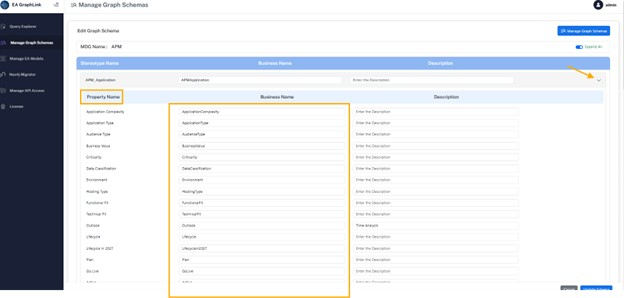
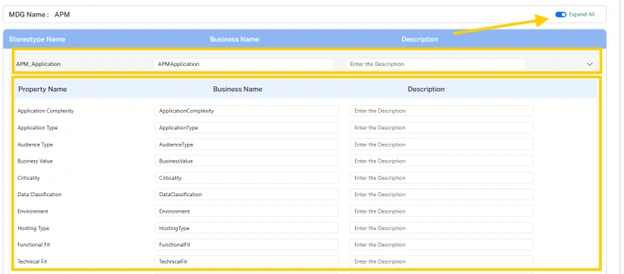
Modifying Business Names for Properties
- Expand the stereotype using the icon on the right side of the row.
- Navigate to the Business Name column for the desired property.
- Enter the updated name to ensure alignment with business terminology.
- Click on Update Schema to save the modifications.
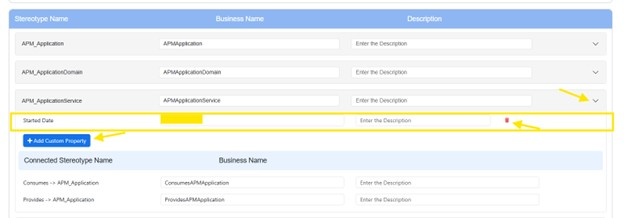
Custom Property
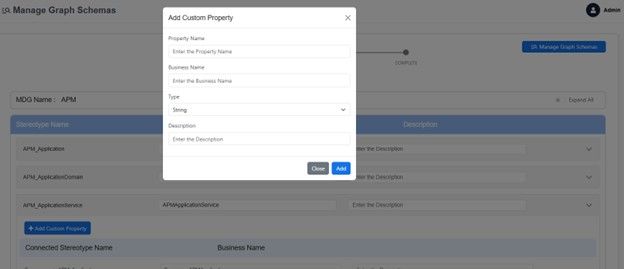
If the model contains custom tag values and these values can be driven with this Add Custom Property button.
Select the stereotype from the designer view, click on “Add Custom Property”
| Field | Description |
|---|---|
| Property Name | Enter the same name used in the EA (Enterprise Architect) model. |
| Business Name | Define the business-friendly name for the property, as required. |
| Type | Only the following types are supported: String, Integer, and Date. |
| Description | Optionally provide a description of the property. |
The added custom properties can be managed from the Designer view.
To modify them, select the appropriate stereotype from the dropdown where the custom property was added.
Use the trash icon to delete a property or click the ‘Add Custom Property’ button to add a new one as needed.
Tip: To expedite the editing process for all properties across stereotypes, utilize the Expand All toggle located at the top-right corner of the page. This functionality instantly expands the properties of all stereotypes, providing a comprehensive view for modifications.
Find model information using search
To perform searches in EA GraphLink, ensure the following prerequisites are met:
- An EA model has been configured. Click here to read more.
- The relevant schema has been uploaded. Click here to read more.
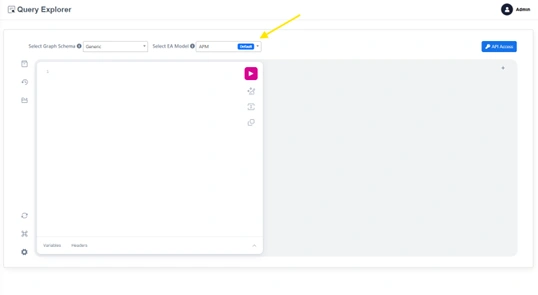
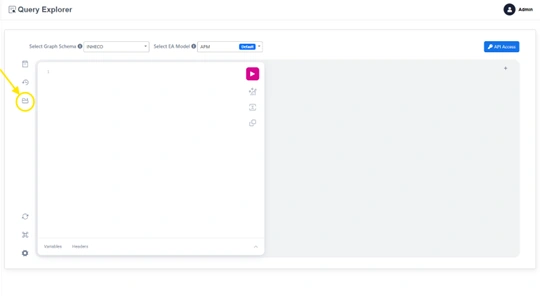
About the Query Explorer
The EA GraphLink – Query Explorer provides a user-friendly interface to interact with the Enterprise Architect Repository. It enables the creation of custom queries to retrieve and analyze data.
Access the Query Explorer as illustrated in the image below.
Analyzing the EA Model Structure in Explorer
The Explorer pane displays the model structure based on the selected schema. The hierarchy includes:
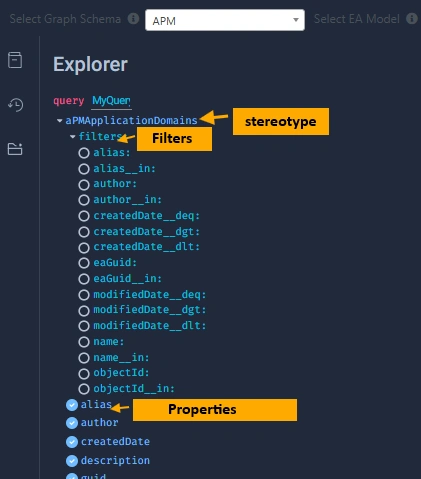
- Level 1: Stereotypes
- Lists available stereotypes as defined in the selected schema.
- Level 2: Properties and Tagged Values
- Expanding a stereotype reveals its associated properties and tagged values.
- Level 3: Filters
- Filters are available for each stereotype to refine data retrieval based on specified conditions.
Building a Report Using Query Explorer
The Query Explorer simplifies the report-building process by automatically transforming the selected objects, properties, and filters into query syntax within the editor window. Customizations can be applied by writing specific queries to tailor the data extraction from the model.
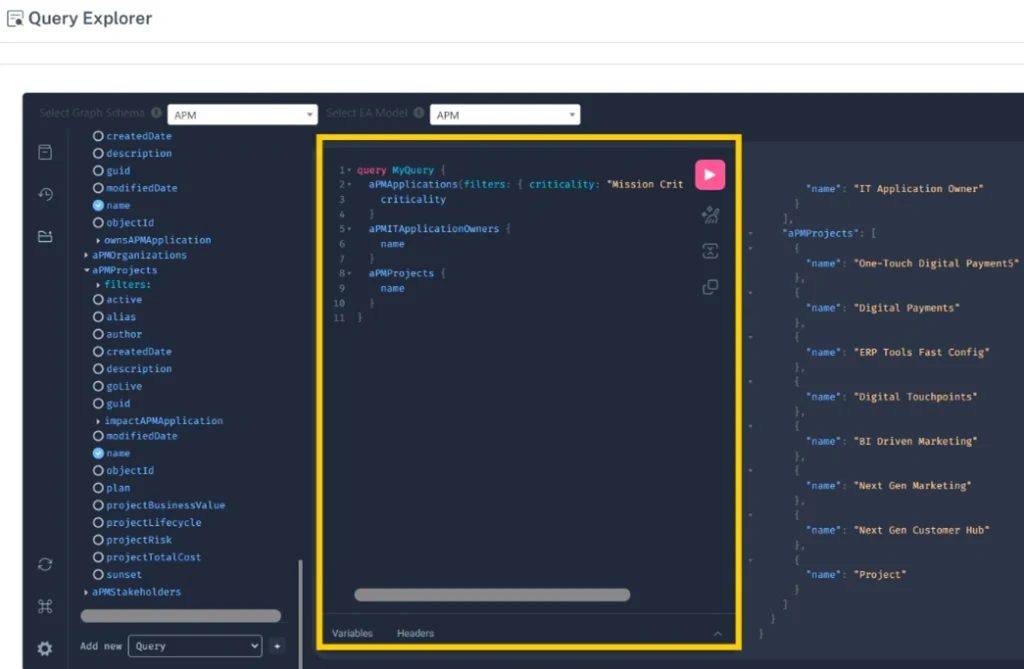
Steps to Build a Report Using Query Explorer:
- Choose the relevant objects and properties to include in the report.
- Use filters to narrow down the result set as needed.
- Enter the desired values into the filters to set specific conditions for data retrieval.
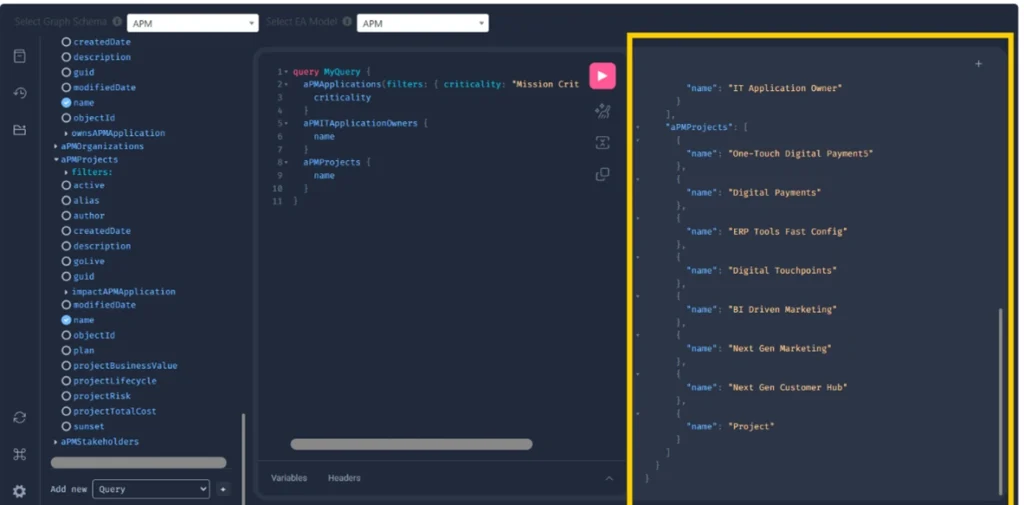
- The Output Pane will display the search results based on the query entered. The output is formatted according to the specified structure, ensuring that only the necessary and relevant data is presented.
Related Articles:
How to Retrieve a List of Applications with Lifecycle Status ‘GoLive’ Using EA GraphLink
This article provides a step-by-step guide to extracting a list of applications with the lifecycle status set to ‘GoLive’ using EA GraphLink’s Query Explorer. Leverage the platform’s intuitive interface to build and refine queries aligned with your model schema.
Click here to read more.
Subscribe to our Newsletter
Get product updates, feature tips, and integration insights in your inbox.


