EA GraphLink — SSO Configuration Guide
Overview
EA GraphLink supports Single Sign-On (SSO) using the OpenID Connect (OIDC) protocol. This allows your organization’s users to sign in to GraphLink using their existing identity provider (IdP) credentials — such as Okta, JumpCloud, PingOne (Ping Identity), Microsoft Entra ID, or any OIDC-compliant provider.
This guide walks you through configuring SSO in GraphLink.
Prerequisites
- Admin access to EA GraphLink
- Admin access to your organization’s identity provider (IdP)
- A registered OIDC application in your IdP (see provider-specific guides for setup steps)
Accessing SSO Configuration
- Log in to EA GraphLink as an Admin user.
- In the left sidebar, click SSO Configuration.
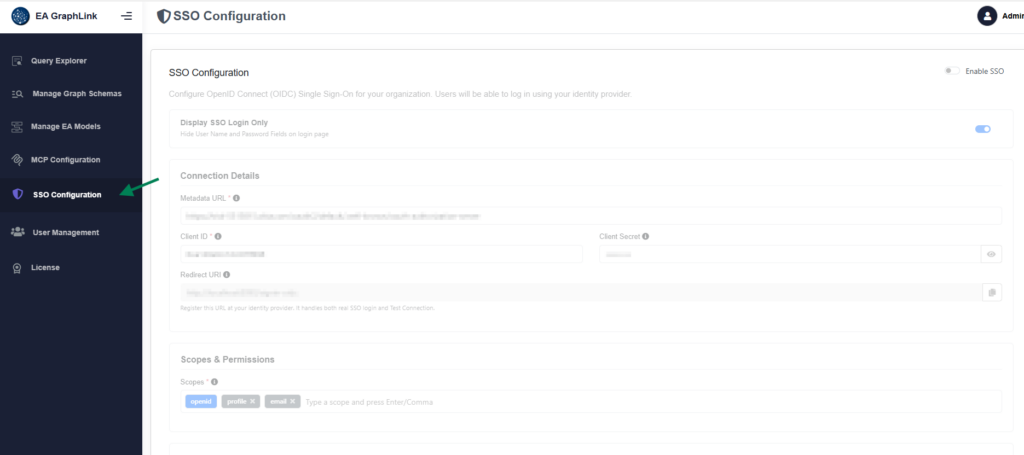
Configuration Sections
1. Enable SSO
Toggle the SSO switch at the top of the page to enable SSO for your GraphLink instance.

2. Display SSO Login Only
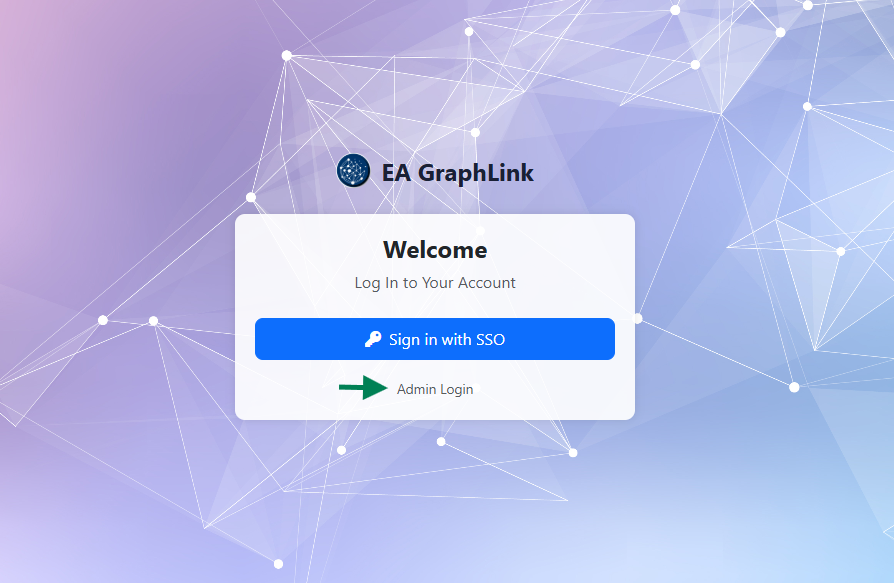
When enabled, the login page shows only the SSO sign-in button. The username/password form is hidden.
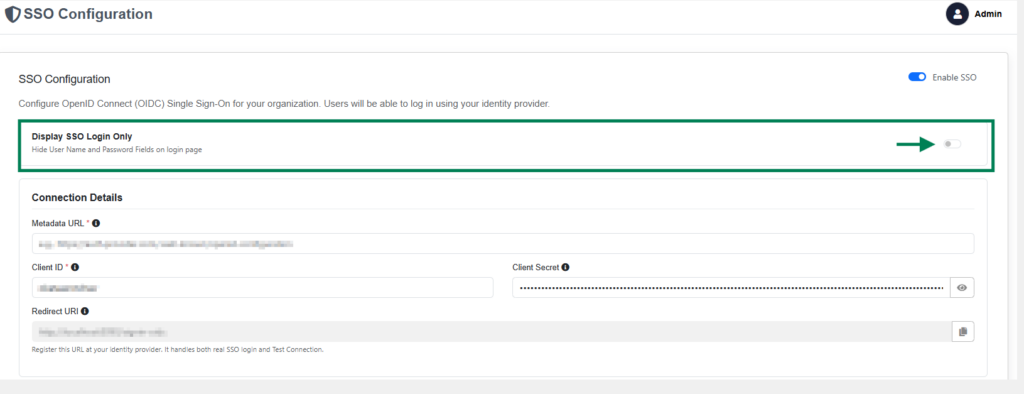
Note: Even in SSO-only mode, an Admin Login link is available at the bottom of the login page. This allows admin users to sign in with a password as a fallback (e.g., if the IdP is unavailable).
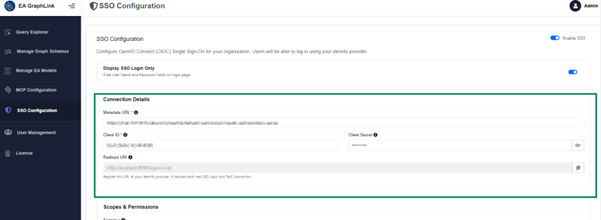
3. Connection Details
| Field | Description |
|---|---|
| Metadata URL | The OIDC discovery endpoint of your identity provider. Usually ends with /.well-known/openid-configuration. This URL tells GraphLink where to find your IdP’s authorization, token, and key endpoints. |
| Client ID | The application/client identifier assigned by your IdP when you registered the GraphLink application. |
| Client Secret | The secret associated with your client ID. This is encrypted before being stored. |
Below the form fields, GraphLink displays two Redirect URIs that you must register in your IdP:
- Redirect URI — Used for the actual SSO login flow (e.g., http://yourserver:8090/signin-oidc)
- Test Connection Redirect URI — Used by the Test Connection feature (e.g., http://yourserver:8090/SSO/TestCallback)
Important: Both redirect URIs must be registered in your identity provider’s application settings. If only the first one is registered, the Test Connection feature will fail.
4. Scopes & Permissions
Scopes determine what information GraphLink requests from the identity provider.
- openid — Always required (cannot be removed)
- profile — Provides access to user profile information (name, etc.)
- email — Provides access to the user’s email address
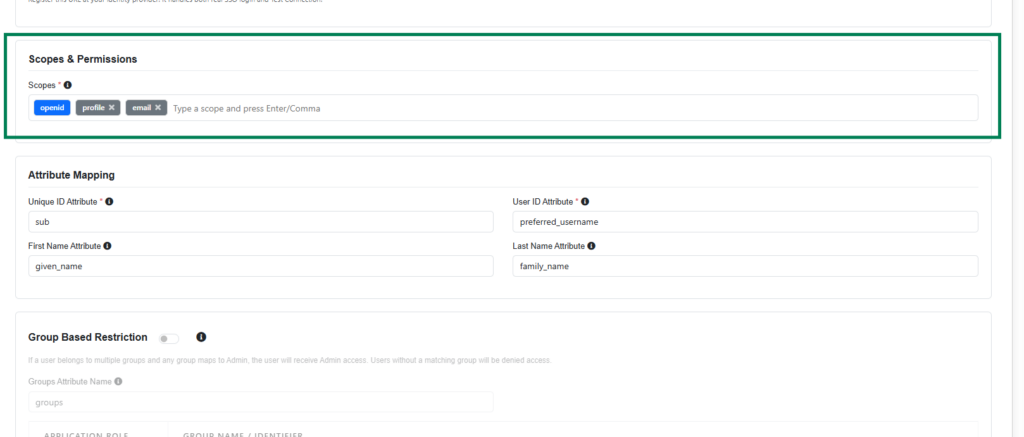
You can add additional scopes by typing them in the input field and pressing Enter or comma. Some providers may require specific scopes for group information (e.g., groups).
5. Attribute Mapping
Maps IdP claim names to GraphLink user attributes.

| Field | Description | Default |
|---|---|---|
| Unique ID Attribute | The claim in the IdP’s token that uniquely identifies a user. This should be a stable, immutable value. | sub |
| Username Attribute | The claim used as the display username in GraphLink. | preferred_username |
Tip: The sub claim is the standard OIDC subject identifier and is the recommended choice for Unique ID. For Username, preferred_username works for most providers. Some providers use name or email instead — check your IdP’s token claims.
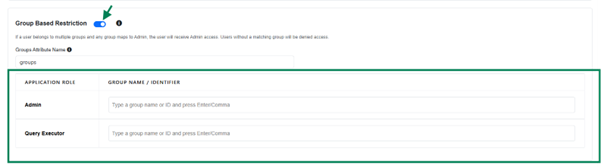
6. Group-Based Restriction
When enabled, GraphLink restricts access based on the user’s group memberships in the IdP.
| Field | Description |
|---|---|
| Groups Attribute Name | The claim name in the IdP’s token that contains group information. Common values: groups, memberOf. |
Below this field is a role mapping table with two rows:
| Application Role | Description |
| Admin | Full access — can manage schemas, models, users, and SSO configuration |
| Query Executor | Can execute GraphQL queries and access the Query Explorer |
For each role, add the IdP group names (or identifiers) that should map to that role. Type the group name and press Enter to add it as a chip.
How role assignment works:
- If a user belongs to a group mapped to Admin, they receive the Admin role.
- If a user belongs to a group mapped to Query Executor, they receive the Query Executor role.
- If a user belongs to groups mapped to both roles, they receive Admin (highest privilege wins).
- If a user does not belong to any mapped group, they are denied access.
Note: Group names are matched case-insensitively. Make sure the group names you enter match exactly what your IdP sends in the token.
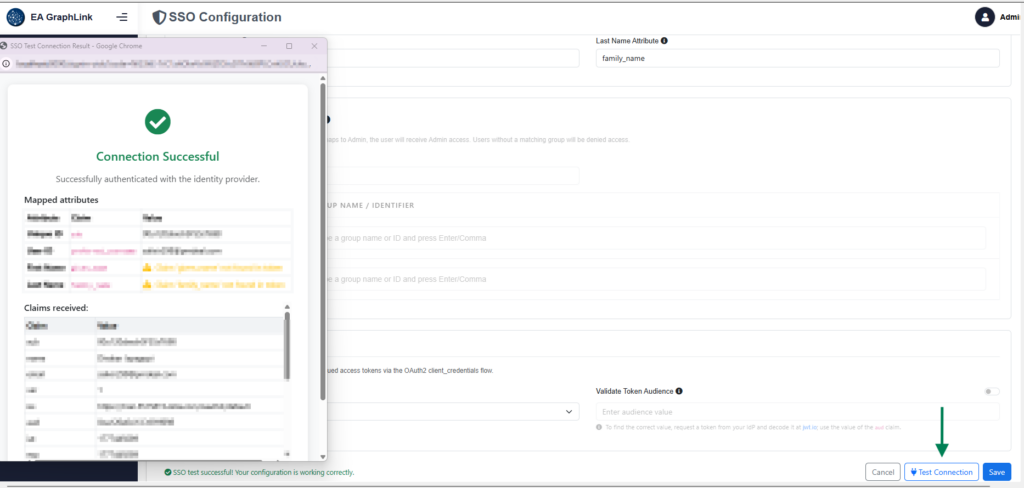
Test Connection
Before saving your configuration, you must validate it using Test Connection.
- Fill in all required fields in the SSO Configuration page.
- Click the Test Connection button.
- A popup window opens and redirects to your IdP’s login page.
- Authenticate with a test user.
- The popup shows the result:
| Result | Meaning |
|---|---|
| Connection Successful (green) | All checks passed. You can save the configuration. |
| Connection Successful — Warning (yellow) | The SSO integration works, but the test user’s groups don’t match any configured group mappings. This is expected if your test user isn’t in one of the mapped groups. You can still save. |
| Connection Failed (red) | There is a configuration issue. Check the error message for details. |
The popup also displays:
- Username — The resolved username from the IdP token
- Claims received — A table showing all claims in the IdP’s token (useful for verifying attribute names)
Tip: The Save button is disabled until a successful (or warning) Test Connection. If you change any configuration field after testing, you must re-test before saving.
Save Configuration
After a successful Test Connection:
- Click the Save button.
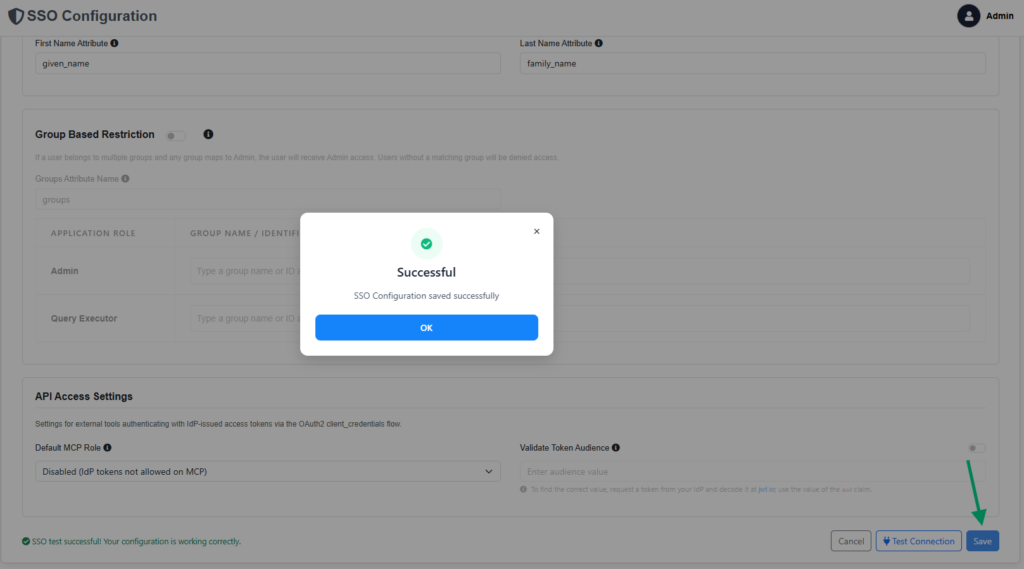
- GraphLink saves the SSO configuration to its settings file.
- The configuration takes effect immediately — no application restart required.
SSO User Management
Automatic User Creation
When a user signs in via SSO for the first time:
- A new user account is automatically created in GraphLink.
- The user’s Unique ID is set from the IdP’s token (e.g., the sub claim).
- The user’s Username is set from the configured Username Attribute.
- The user’s Role is determined by Group-Based Restriction settings (or defaults to Query Executor if group restriction is disabled).
- The user is marked as an SSO user and set to Active.
SSO Users vs Local Users
| Capability | SSO User | Local User |
|---|---|---|
| Login with SSO | Yes | No |
| Login with password | No | Yes |
| Change password | No | Yes |
| Username managed by | IdP | Admin |
| Role managed by | Group mapping (if enabled) | Admin |
| Can be deactivated by admin | Yes | Yes |
Deactivating SSO Users
Admins can deactivate SSO users from the User Management page:
- Navigate to User Management.
- Find the SSO user (indicated by an SSO badge).
- Toggle the user’s status to Inactive.
- The next time the user tries to sign in via SSO, they will see an “Account Inactive” message and be denied access.
Important: Deactivated SSO users are not automatically reactivated when they sign in. An admin must manually reactivate them.
Switching SSO Providers
You can change the SSO provider at any time without restarting GraphLink:
- Go to SSO Configuration.
- Update the Metadata URL, Client ID, Client Secret, and other fields.
- Run Test Connection to validate.
- Click Save.
- The new provider takes effect immediately.
Note: If a user clicks “Sign in with SSO” while the admin is switching providers, GraphLink automatically detects the stale configuration and retries the login with the updated provider. No manual page reload is required.
Troubleshooting
“Account Inactive” after first SSO login
An admin has deactivated the user’s account. Contact your GraphLink administrator to reactivate.
SSO button not visible on login page
SSO is not enabled. An admin needs to enable it in SSO Configuration.
“User does not belong to any authorized group”
Group-Based Restriction is enabled and the user is not a member of any group that maps to a GraphLink role. Either:
- Add the user to an appropriate group in your IdP, or
- Update the group mappings in GraphLink’s SSO Configuration.
Test Connection succeeds but login fails
This can happen if:
- The Redirect URI (/signin-oidc) is not registered in the IdP (only the Test Connection URI was registered).
- The IdP’s token endpoint authentication method is not supported. GraphLink auto-detects client_secret_basic and client_secret_post methods.
“Invalid client” error during login
The Client ID or Client Secret is incorrect, or the IdP requires a different authentication method. Verify your credentials and re-run Test Connection.
Group claim not found in token
The identity provider is not including group information in the ID token. Check your IdP’s attribute mapping or claim configuration to ensure groups are included in the ID token (not just the UserInfo endpoint or Access token).
Subscribe to our Newsletter
Get product updates, feature tips, and integration insights in your inbox.


